")

")


")

Imagine walking into your home and the lights gently brighten, the thermostat adjusts to your preferred temperature, and your favorite playlist starts in the background—all without lifting a finger. That vision is no longer science fiction; it is smart home automation working quietly behind the scenes. In this tutorial you will learn, in plain language, how to turn an ordinary dwelling into a responsive, energy-saving, and genuinely convenient living space.
We will distill the key lessons from yoyoTech’s video “Smart Home Automation: The Ultimate Beginner’s Guide” and transform them into an actionable roadmap. By the end you will understand protocols like Zigbee and Z-Wave, evaluate hubs such as Samsung SmartThings or Home Assistant, and create practical automations with sensors, bulbs, and buttons. Whether you already own a few connected devices or are starting with nothing, this guide promises to eliminate confusion and set you up for long-term success in the rapidly growing world of smart home automation.
1. Understanding the Foundations of Smart Home Automation
1.1 Define Your Objectives First
The best way to avoid costly mistakes is to begin with a clear purpose. Ask yourself what smart home automation should actually achieve for you. Is it security, energy efficiency, accessibility, or sheer convenience? For example, a frequent traveler might prioritize remote door-lock monitoring, while a parent could focus on motion-activated nursery lighting. Write down three to five specific outcomes; these will guide every purchase and configuration step.
1.2 Audit the Devices You Already Own
You may already possess “smart-ready” hardware without realizing it. Modern routers, game consoles, voice assistants, and even TVs often include built-in automation hooks. Open the companion app (e.g., Google Home, Alexa, or Apple Home) and list everything that shows up. Each compatible gadget reduces the amount of new gear you have to buy and helps unify your forthcoming ecosystem.
Highlight: On average, households save 5–15 % on annual energy bills after installing automated thermostats and occupancy sensors—small objectives can deliver measurable returns.
2. Exploring Communication Protocols: Zigbee, Z-Wave, Wi-Fi & Bluetooth
2.1 How Devices Talk to One Another
Smart home automation succeeds only when devices can reliably “speak” a common language. The most popular protocols—Zigbee, Z-Wave, Wi-Fi, Bluetooth LE, and the new Matter standard—differ in range, power draw, and interoperability. Zigbee and Z-Wave form low-power mesh networks ideal for battery sensors. Wi-Fi offers high bandwidth, good for cameras but consumes more power. Bluetooth LE works well for wearables or proximity triggers within 10 m.
2.2 Comparative Snapshot
| Protocol | Key Advantage | Potential Limitation |
|---|---|---|
| Zigbee | Self-healing mesh, low power, widespread | Requires dedicated hub or dongle |
| Z-Wave | Longer range per hop, less 2.4 GHz interference | Slightly costlier devices |
| Wi-Fi | No hub needed, high throughput | High power usage, router congestion |
| Bluetooth LE | Great for mobile presence detection | Short range, limited nodes |
| Matter | Cross-brand interoperability, local control | Still emerging, limited hardware |
Tip: Mixed-protocol homes are common. A single hub that supports multiple radios (for example, Home Assistant with a Zigbee/Z-Wave dongle) keeps everything under one roof.
3. Picking Your First Hub or Controller
3.1 Big-Brand Ecosystems
Commercial platforms such as Samsung SmartThings, Amazon Alexa, Google Home, and Apple HomeKit focus on simplicity. Setup is guided, devices self-discover, and cloud backups keep settings safe. A SmartThings hub paired with a Zigbee button, for instance, lets beginners create press-to-toggle automations within minutes. The trade-off is reliance on vendor servers for some routines, which can hinder privacy or offline resilience.
3.2 Open-Source Powerhouses
For tinkerers, open-source controllers like Home Assistant, openHAB, or Hubitat Elevation deliver unparalleled flexibility and local control. Home Assistant, installed on a Raspberry Pi, can integrate over 2 000 services—from Philips Hue to Tesla cars—through community “integrations.” Coupled with a Conbee II or SkyConnect dongle, your Pi becomes a multi-radio bridge rivaling commercial hubs at a fraction of the cost.
“Open-source hubs empower homeowners to own their data and automate without vendor lock-in, making them future-proof and highly customizable.”
– Dr. Luis Torres, IoT Researcher at MIT
Highlight: If you prefer “set it and forget it,” start with SmartThings; if you like endless tweaking, pick Home Assistant. You can always migrate later because devices are largely protocol-agnostic.
4. Crafting Your First Automations: Triggers, Conditions, Actions
4.1 Triggers—The Starting Gun
A trigger is the event that kicks off smart home automation. Common examples include a motion sensor detecting movement, a door contact opening, or a specific time like sunset. In SmartThings you would navigate to Automations → Add and select “Motion detected” from your hallway sensor as the trigger.
4.2 Conditions—The Filters
Conditions ensure that automations execute only when meaningful. For instance, you may want the hallway light to turn on only if it is after 6 p.m. and the luminance sensor reads below 50 lux. Multiple conditions prevent nuisance activations and save energy.
4.3 Actions—The Payoff
Actions are the commands that follow: turning on lights, adjusting thermostats, sending phone notifications, or playing audio. Integrate multiple actions into one scene for dramatic effect. A “Goodnight” routine might lock doors, lower blinds, dim lights to 20 %, and arm the security system.
- Open your hub’s app and select “Create Automation.”
- Choose a trigger: e.g., Bedroom Motion Sensor “motion detected.”
- Add conditions: Time between 22:00 and 06:00; Lux < 30.
- Select actions: Turn on bedside lamp at 15 % brightness.
- Test the automation by waving at the sensor at night.
- Refine brightness or delay based on feedback.
- Document the rule in a spreadsheet for future troubleshooting.
5. Expanding Your Ecosystem: Sensors, Actuators & Scenes
5.1 Recommended Starter Kit Components
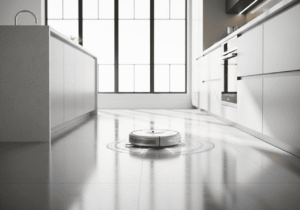
- Zigbee motion sensor for occupancy detection.
- Temperature/humidity sensor for climate control.
- Smart plug to retrofit dumb appliances.
- LED light strip for accent lighting.
- Multi-button remote for manual overrides.
5.2 Real-World Example: Morning Routine Scene
You wake at 07:00; your phone’s alarm can trigger Home Assistant via a webhook. The bedroom lights fade in over two minutes, blinds lift 30 %, and the coffee maker smart plug powers on. If the weather API reports rain, a reminder to carry an umbrella is spoken through the Google Nest speaker. When you leave, a contact sensor on the front door triggers an “Away” scene, which turns off interior lighting and switches the thermostat to Eco mode.
Pro-Tip: Group multiple lights into a scene rather than automating each bulb. Scenes simplify later changes and reduce hub processing load.
6. Taking Your Smart Home Automation to the Next Level
6.1 Voice Control & Presence Detection
Integrate Amazon Alexa, Google Assistant, or Apple Siri to command devices hands-free. Presence detection—via Bluetooth LE from your smartphone or Wi-Fi network pings—lets your hub recognize when you arrive or leave. Combine both features for powerful routines: when your phone disconnects from Wi-Fi for 10 minutes, the system sets Home to “Away,” but you can still use a voice command to override if a family member is inside.
6.2 Dashboards & Energy Monitoring
Home Assistant’s “Lovelace” dashboards provide live charts of temperature, energy, and device states. Add a smart power bar to track consumption per outlet. Establish an automation that sends an alert if the washing machine draws less than 5 W for five minutes, indicating the cycle is finished.
6.3 Security, Backups, and Updates
Finally, secure your smart home automation setup with strong passwords, two-factor authentication, and regular firmware updates. On open-source platforms schedule weekly snapshots to external storage so you can recover quickly after SD-card corruption or configuration errors.
Frequently Asked Questions
1. Do I really need a hub for smart home automation?
Not always. Wi-Fi devices can work hub-free, but a dedicated controller consolidates rules, operates locally during internet outages, and reduces network congestion.
2. Will adding many devices slow my Wi-Fi?
Only if they are all Wi-Fi based. Zigbee and Z-Wave offload traffic onto separate radios, preserving router bandwidth for laptops and phones.
3. Can renters install smart home automation without violating lease terms?
Yes. Stick-on sensors, smart plugs, and battery-powered buttons avoid drilling holes and are fully removable at move-out.
4. How secure are voice assistants controlling my lights and locks?
Most assistants encrypt traffic, but risks remain. Use unique, complex passwords on associated accounts and enable voice PINs for sensitive actions like unlocking doors.
5. What happens to my automations if the manufacturer ends cloud support?
Cloud-dependent routines may stop. That is why many users migrate to local-first platforms such as Home Assistant, where automations remain functional regardless of vendor decisions.
6. Is Matter worth waiting for?
Matter promises cross-brand compatibility, but adoption is gradual. Buying Zigbee or Z-Wave today is still safe because many products offer firmware updates or Matter bridges down the road.
7. How can I troubleshoot an automation that triggers inconsistently?
Enable verbose logging on your hub, confirm sensor battery levels, and test latency by triggering manually. Often, a weak mesh connection or expired battery is the culprit.
We covered a lot of ground—from defining goals and choosing between Zigbee or Wi-Fi, to creating efficient triggers, conditions, and scenes. Remember these key points:
- Start with a clear outcome and audit existing hardware.
- Select a hub that matches your comfort level: SmartThings for simplicity, Home Assistant for full control.
- Mix protocols to balance range, power, and cost.
- Use conditions to keep automations context-aware.
- Secure your network with updates and backups.
Your journey into smart home automation is iterative—begin with a single motion-activated light, learn from it, and progressively layer more devices and routines. If you found this tutorial helpful, consider watching the full yoyoTech video embedded above and subscribing to their channel for ongoing tips. Now, go forth and build a home that works for you, not the other way around!
Explore more home & organization articles at: selectionsprime.com